How to Install WordPress on HostGator Hosting

Before I get into the details of installing WordPress, I would like to explain you a bit about what the WordPress is! WordPress is a free and open source custom management system (CMS) based on the MySQL and PHP. To manage and function the WordPress blog or website, you have to install WordPress on your web server.
So today you will learn how to install WordPress on HostGator hosting step by step with me. There are 5 steps that will be detailed in the following.
Install WordPress on HostGator Hosting with 5 Major Steps
To install WordPress you need a Cpanel. You can find your Cpanel URL at the beginning you purchase a HostGator hosting. It was sent to your inbox. Then copy the Cpanel URL which is similar to this "https://gator4053.hostgator.com:2083" to access it on your browser.Before you start to install WordPress files on your hosting or web server, I would like to suggest you for a few things.
- You have to choose a username
- Choose a strong password by adding some hashtag, Number, and letter.
- User an email that you use normally.
Step 1: On HostGator Hosting Cpanel
Here is an example HostGator Cpanel login where you can log in your Cpanel.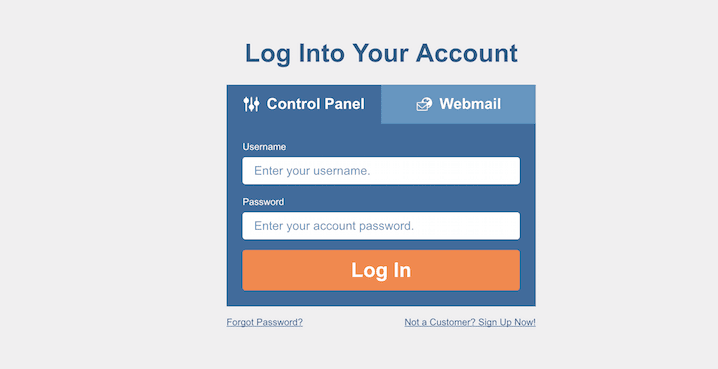
Step 2: Start to Install WordPress
Now you have successfully logged in your Hosting Cpanel, then it is time to install a WordPress to your hosting as well as to make a WordPress Blog. In this below picture, you can see the WordPress Logo. Click on the WordPress Logo to move to another step.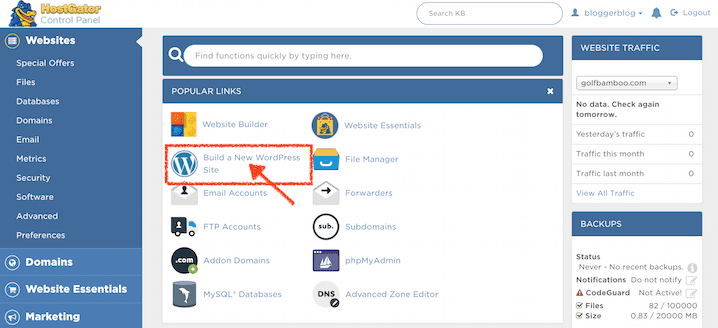
Step 3: Choose a Domain for Installation
If you have more than one domain name on HostGator, then you can use one of them that you want to use it to install a WordPress.- Select a Domain you prefer to use
- If you want to install the WordPress in the directory such as "blog" but if you don't need a directory then keep this "blog" in the blank field.
- Click Next button when you are ready.

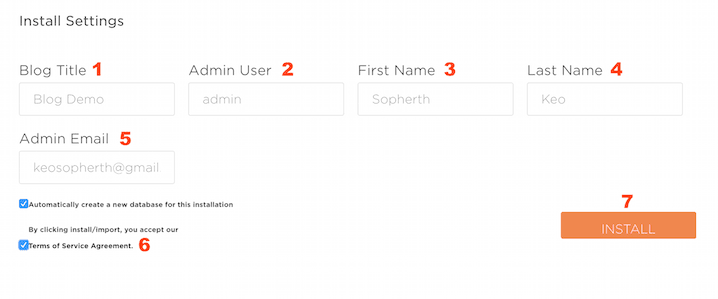
Step 4: Installation Settings
Now it is time to provide some more details for your installation.- Put Your Blog Name in
- Fill up a username or admin username (Don't forget it)
- Provide your First Name
- Provide your Last Name
- Your email address (The one that is working well)
- Tick to accept the term and condition
- When you are ready click on "INSTALL" button.
Step 5: Installation is done and Login Your WordPress Blog
When you are ready for step #5 then click Install button, then there will be processing about 1 minutes reach this successfully step. You will receive installation details in your inbox when it has done in the final step. Username and first Password are important to you. Keep it in a secure place then you can change the Password from the Cpanel admin.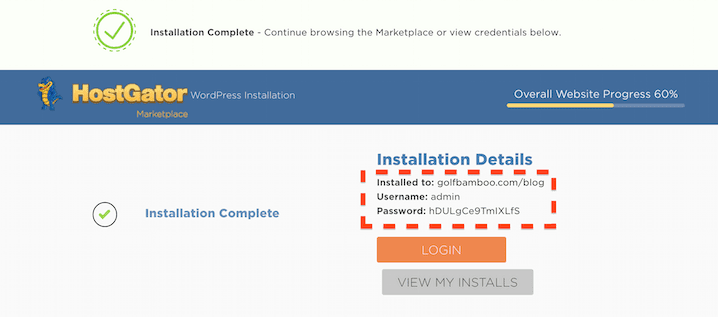
If you have any question about this installation guideline please leave your comment below, I will answer to you as soon as possible. Stay bless!


