Stylish - Sidebar Subscription Box Widget For Blogger

Although a subscription box is of no use if it is not eye catchy which attracts visitors like a magnet and lures them enough that they can't help but just put their email address and sign up. Overall this is why we use this widget, right?
This widget I am going to share is really unique and I put several hours to design it & make it perfect. A lot of trial and error made it possible for me to come up with this stylish widget working perfectly on every template.
Previously you may have installed so many other sidebar subscription box widgets and I bet most of them were not in alignment with your template when installed. Because of poor CSS styling and Sidebar Widgets' settings of one's template make these things problematic.
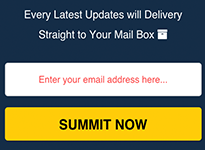
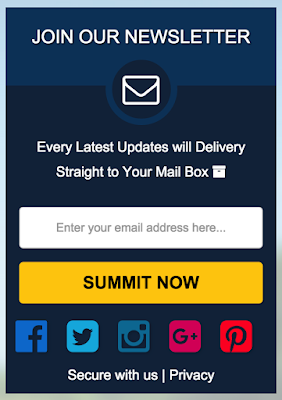
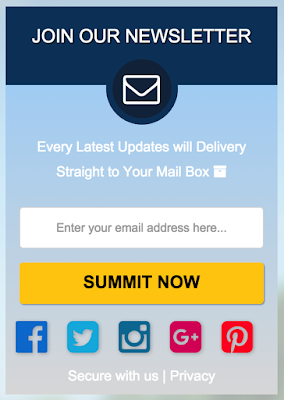
This widget will definitely work with every template as it is shown in the screenshot because I have taken care of everything. I tested it on different templates and made changes accordingly to everything that was preventing it from appearing as I wanted it to be.
A live example of it can be seen here on my blog's sidebar. Although, it is little different but basic theme is same. Older sidebar widgets provided on this blog might not have worked on your blog just because of the same problem but this time I learned it. Let us begin the process.
How to Install Feed Burner Subscription Box For Blogger?
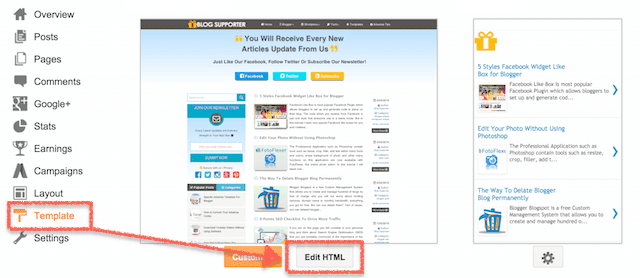
Step 1: Currently login to your blog writer account.Step 2: On control panel go to "Template" menu and afterward click "Edit HTML" button.

Step 3: Now you are on the HTML Code area, just click anywhere in it then press Ctrl + F or Command + F for Mac to search for <head> tag.
Step 4: Now after you found the <head> tag, please copy this Awesome Font Code below and place below it then click "Save Template" button. If you are not able to save this code please convert it to text before you place it below <head> tag or here is the HTML Convertor Tool. If you already added this Awesome Font just jump to step 5.
<link rel="stylesheet" href="https://maxcdn.bootstrapcdn.com/font-awesome/4.5.0/css/font-awesome.min.css">Step 5: It is a time to add CSS code to your blog. Choose one of these two CSS styles then Press Ctrl + F or Command + F for Mac to search for </b:skin> then copy this below CSS code and paste it and after that click on "Save Template" button.
Style #1

/*----[Subscribe Widget Sidebar]---------------*/
#sidebar-subscribe {
padding-bottom: 5px;
font-family: inherit;
display: block;
margin: 10;
width: 100%;
border-radius: 0px;
background: #152e48;
}
#sidebar-subscribe .email_icon {
display: table;
margin: -35px auto 0px;
font-size: 40px;
padding: 12px;
height: 25px;
width: 25px;
background-color: #152e48;
color: #fff;
border-radius: 50px;
border: 7px solid #0c4068;
line-height: 0;
}
#sidebar-subscribe .main_tagline {
padding-top: 10px;
line-height: 2.2em;
font-size: 20px;
font-weight: bold;
margin: 0;
height: 75px !important;
overflow: hidden;
font-weight: normal;
color: #fff;
text-align: center;
text-shadow:1px 1px 1px rgba(0,0,0,0.7);
border: 0;
background-color: #0c4068;
}
#sidebar-subscribe p {
font-size: 15px;
color: #fff;
line-height: 27px;
padding: 5px 10px 5px;
text-align: center;
width: 80%;
margin: 5px auto 20px;
border-bottom: 0px dotted #fff;
border-radius: 0px;
}
#sidebar-subscribe .rssform {padding:0;margin:0 auto;display: block;color: #444;}
#sidebar-subscribe .rssform input {
padding: 8px;
margin: 20px auto 15px;
font-size: 13px;
color: #444;
text-align: center;
display: block;
font-family: inherit;
font-weight: normal;
width: 90%;
height: 45px;
text-transform: normal;
outline: none !important;
border: 1px solid #ddd;
border-radius: 4px;
background: #fff;
box-sizing: border-box !important;
}
#sidebar-subscribe .rssform .button {
background: #fecc0a;
color: #000!important;
border: 0px solid #FFFFFF;
border-radius: 4px;
margin-top: 15px;
outline: none !important;
transition: all .3s ease-in-out;
padding: 5px 2px !important;
float: none;
box-shadow:1px 1px 1px rgba(0,0,0,0.3);
text-transform: uppercase;
font-size: 19px;
font-weight: bold;
cursor: pointer;
}
#sidebar-subscribe .rssform .button:hover {background: #e1d91b;}
#sidebar-subscribe .policy {
color: #fff;
text-align: center;
font-size: 15px;
margin: 0;
padding: 3px;
line-height: 25px;
}
#sidebar-subscribe .policy a {
color: #fff;
text-decoration: none !Important;
}
#sidebar-subscribe form {margin-bottom: 10px !important;}
/*---[The Awesome Social]------------------ */
#socialfontawesome {
text-align:left;
float: center;
float:left;
color: #fff;
margin-top: -5px;
margin-bottom: 3px;
padding-bottom: 6px;
margin-left:8px;
background: transperance;
}
#socialfontawesome a {
display: inline-block;
font-size: 40px;
background:none;
color:#fff;
width: 30px;
height:30px;
line-height: 28px;
padding: 6px;
margin: 0px 5px 4px;
border: 0px solid #152e48;
text-shadow: 1px 1px 5px rgba(0, 0, 0, .2);
}
#socialfontawesome a:hover{
background:none; #0198be;
color: #2193b4;
-webkit-transform: rotate(10deg);
-moz-transform: rotate(10deg);
-o-transform: rotate(10deg); border: 0px solid #0198be;
-moz-transform: scale(1.3);
-webkit-transform: scale(1.3);
-o-transform: scale(1.3);
transform: scale(1.3);
}
Style #2

/*----[Subscribe Widget Sidebar]----------------------*/
#sidebar-subscribe {
padding-bottom: 5px;
font-family: inherit;
display: block;
margin: 10;
width: 100%;
border-radius: 0px;
background: #def7e1;
background-image: -webkit-linear-gradient(top, #a2d3fb, #dedede);
background-image: -moz-linear-gradient(top, #a2d3fb, #dedede);
background-image: -ms-linear-gradient(top, #a2d3fb, #dedede);
background-image: -o-linear-gradient(top, #a2d3fb, #dedede);
background-image: linear-gradient(to bottom, #a2d3fb, #dedede);
}
#sidebar-subscribe .email_icon {
display: table;
margin: -35px auto 0px;
font-size: 40px;
padding: 12px;
height: 25px;
width: 25px;
background-color: #152e48;
color: #fff;
border-radius: 50px;
border: 7px solid #0c4068;
line-height: 0;
}
#sidebar-subscribe .main_tagline {
padding-top: 10px;
line-height: 2.2em;
font-size: 20px;
font-weight: bold;
margin: 0;
height: 75px !important;
overflow: hidden;
font-weight: normal;
color: #fff;
text-align: center;
text-shadow:1px 1px 1px rgba(0,0,0,0.7);
border: 0;
background-color: #0c4068;
}
#sidebar-subscribe p {
font-size: 15px;
color: #fff;
line-height: 27px;
padding: 5px 10px 5px;
text-align: center;
width: 80%;
margin: 5px auto 20px;
border-bottom: 0px dotted #fff;
border-radius: 0px;
}
#sidebar-subscribe .rssform {padding:0;margin:0 auto;display: block;color: #444;}
#sidebar-subscribe .rssform input {
padding: 8px;
margin: 20px auto 15px;
font-size: 13px;
color: #444;
text-align: center;
display: block;
font-family: inherit;
font-weight: normal;
width: 90%;
height: 45px;
text-transform: normal;
outline: none !important;
border: 1px solid #ddd;
border-radius: 4px;
background: #fff;
box-sizing: border-box !important;
}
#sidebar-subscribe .rssform .button {
background: #fecc0a;
color: #000!important;
border: 0px solid #FFFFFF;
border-radius: 4px;
margin-top: 15px;
outline: none !important;
transition: all .3s ease-in-out;
padding: 5px 2px !important;
float: none;
box-shadow:1px 1px 1px rgba(0,0,0,0.3);
text-transform: uppercase;
font-size: 19px;
font-weight: bold;
cursor: pointer;
}
#sidebar-subscribe .rssform .button:hover {background: #e1d91b;}
#sidebar-subscribe .policy {
color: #fff;
text-align: center;
font-size: 15px;
margin: 0;
padding: 3px;
line-height: 25px;
}
#sidebar-subscribe .policy a {
color: #fff;
text-decoration: none !Important;
}
#sidebar-subscribe form {margin-bottom: 10px !important;}
/*---[The Awesome Social]-------------------- */
#socialfontawesome {
text-align:left;
float: center;
float:left;
color: #fff;
margin-top: -5px;
margin-bottom: 3px;
padding-bottom: 6px;
margin-left:8px;
background: transperance;
}
#socialfontawesome a {
display: inline-block;
font-size: 40px;
background:none;
color:#fff;
width: 30px;
height:30px;
line-height: 28px;
padding: 6px;
margin: 0px 5px 4px;
border: 0px solid #152e48;
text-shadow: 1px 1px 5px rgba(0, 0, 0, .2);
}
#socialfontawesome a:hover{
background:none; #0198be;
color: #2193b4;
-webkit-transform: rotate(10deg);
-moz-transform: rotate(10deg);
-o-transform: rotate(10deg); border: 0px solid #0198be;
-moz-transform: scale(1.3);
-webkit-transform: scale(1.3);
-o-transform: scale(1.3);
transform: scale(1.3);
}

Step 7: Now you can copy this below HTML code to paste into the HTML/Javascript text area and then press "Save" button.
<div id="sidebar-subscribe">
<div class="main_tagline">JOIN OUR NEWSLETTER</div><div class="email_icon"><i class="fa fa-envelope-o"></i></div>
<p>Every Latest Updates will Delivery Straight to Your Mail Box <i class="fa fa-archive" style="color:#fff"></i></p>
<div class="rssform">
<form action="http://feedburner.google.com/fb/a/mailverify" method="post" target="popupwindow" onsubmit="window.open('http://feedburner.google.com/fb/a/mailverify?uri=theblogsupporter', 'popupwindow', 'scrollbars=yes,width=550,height=520');return true">
<input type="text" name="email" placeholder="Enter your email address here..." />
<input type="hidden" value="theblogsupporter" name="uri" />
<input type="hidden" name="loc" value="en_US" />
<input value="Summit Now" class="button" type="submit" />
</form>
</div>
<div id='socialfontawesome'>
<a href='Add Your Facebook URL Here' rel='nofollow' target='_blank' title='Facebook'><span style='color: #037dd3'><i class='fa fa-facebook-official'></i></span></a>
<a href='Add Your Twitter URL Here' rel='nofollow' target='_blank' title='Twitter'><span style='color: #03b5e1'><i class='fa fa-twitter-square'></i></span></a>
<a href='Add Your Instagram URL Here' rel='nofollow' target='_blank' title='Instagram'><span style='color: #027aa1'><i class='fa fa-instagram'></i></span></a>
<a href='Add Your Google Plus URL Here' rel='nofollow' target='_blank' title='Google Plus'><span style='color:#db1b68'><i class='fa fa-google-plus-square'></i></span></a>
<a href='Add Your Pinterest URL Here' rel='nofollow' target='_blank' title='Pinterest'><span style='color:#ff002a'><i class='fa fa-pinterest-square'></i></span></a>
</div>
<div class="policy">
Secure with us | <a href=‘Add Your Privacy URL Here’> Privacy</a> | <a href=‘http://www.blogsupporter.com/2016/02/pro-subscription-box-for-blogger-widget.html’> Get this Widget</a></div>
</div>
The Final step you need to replace, add and change some joints in step 7 such as below;
- You need to replace the Feed Burner ID from "theblogsupporter" to your personal one.
- Add Your Social Media Profile such as Facebook, Twitter, Instagram, Google Plus and Pinterest on Add Your ....... URL Here.
- Add Your Privacy URL in the "Add Your Privacy URL Here".
You can also use for a simple style one that some simple design for Feed Burner Subscription From.
The job is done and you can use this subscription box on your blog and I hope you enjoy it. Have a nice day.
Wait, You might be thinking that why the heck did not I tell you to put the whole CSS+HTML to sidebar HTML/JavaScript widget, right? Well, there is no good reason or bad but I like to put the whole CSS code inside the template code altogether. We had installed the Google font too.
So did this widget work for you? Was it as clean as shown in the Screenshots? Did you face any problem? Need help with template customization? Just ask me in the comments and I'll do my best. Thanks for reading and using my widget for free.
Share this post, do comment and Stay blessed!!


