Create Google Adsense Unit To Place on Blog

How To Create Google Adsense Unit To Place on Your Blog
Step 1: Login your Google Adsense Account
Step 2: You will see a few tabs then just click on "My Ad" tab
Step 3: Click on "New Ad Unit"

Recommended

Horizontal banners

Vertical banners

Rectangular sizes

Responsive

Custom Sizes

Link Ads

Step 5: Now after you choose the ads size, you can use the ads background, text and link color that you would like to design for your ad banners and also you could choosing text font that shows in this section then Just select one of them.

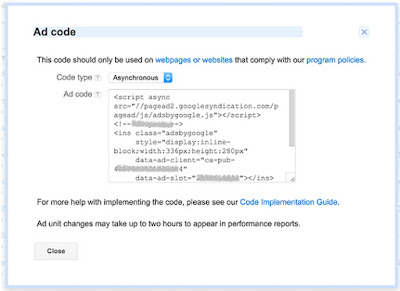
Step 6: This is the last step of creating ad units, and after you choose the ad banner size, background color, you need to click on "Save and get code" to receive a code for placing in your blog. Copy that code and keep it, then click the close button.

Step 7: Login in your blogger then go to "Layout"
Step 8: Find out the sidebar area that you would like to place your ads inside then click on "Gadget" add the HTML/Javascript [+].

Step 8: Now paste your ad code that copied from the step #6 in the text area then click "Save" to save the code.
Finally, you have completed step#1 - #8 the ads banner will show on your website next few minutes. But remember that please do not click on the ad by yourself or ask someone to do it, otherwise, your Google AdSense account will be ban very soon. Here is the way to keep your Google Adsense account safety by avoiding these 12 mistakes.


